Admin
- 20 May 2025
- 3 Minutes to read
- Contributors

- Print
- DarkLight
Admin
- Updated on 20 May 2025
- 3 Minutes to read
- Contributors
- Print
- DarkLight
Article summary
Did you find this summary helpful?
Thank you for your feedback!
1. Active Service description
WhatsAPP: By enabling this plugin, the user will be able to access and send out messages via Whatsapp and configure chatbots for automated responses for their businesses.
2. Credits
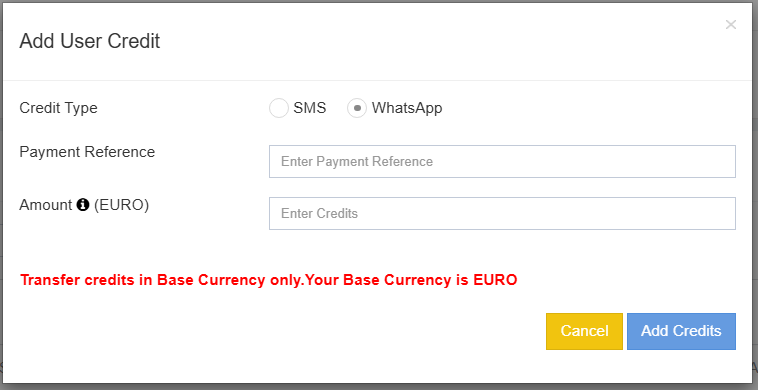
The user will have a separate wallet balance for Whatsapp. The admin can view the credit balance for SMS messaging and Whatsapp separately. Click on Add new to add the credits to the user's balance. Select Whatsapp, enter a payment reference, enter the amount and click on Add credits to top-up the users balance.
3. User Rate plan
In the WhatsApp section, you assign the user which rate plan needs to be applied to the user. Select the rate plan from the dropdown menu. All the rate plans which you’ve configured in the billing section and you can select the same as per your requirement.
WhatsApp Rate Plans
Similar to the rate plans defined for the MT messages, for WhatsApp the admin will need to define the rate plans for Whatsapp. Here, the admin can define the WhatsApp rate plans and manage the billing for their users. In the actions section you can
1. Edit: click on the edit button to change the rate plan name or enable/disable the rate plan.
2. View: Click on View button, to view and modify all the prices configured in that rate plan. Whenever you update the rate plan, the updated price will apply for all the users to whom you have assigned the rate plan.
3. Copy: Click on the copy button, to copy the rate plan and enter another name to create the same rate plan with a different name.
4. Delete: Click on delete to delete the rate plan. Please note, that this action cannot be undone and you’ll have to create the rate plan again from the beginning.
.png)
Click on Add new rate plan to create a new rate plan for your users.
Step 1: Enter the Friendly Rate plan name. Select if you want to keep the rate plan active or not and then click on Continue to move to the next steps.
.png)
Step 2: In this step you can define the various prices for the rate plan and configure how to bill your user.
Country Code: Select the country for which you want to create the rate plan.
Cost price: Here you need to configure the cost price which you’re being charged for sending each message by META.
Selling Price: This is the selling price which you will be charging your users for each message.
Platform Charge: In some cases, admins want to charge the users the platform fee for using their platform for sending the messages. Let me elaborate on a few use cases how you can use these configurations in different ways to charge the users.
.png)
Case 1:
The billing with META is being handled by the admin directly and the user will pay the bill amount to the admin and the admin does not want to charge the user any platform fees. So here, the admin can define only the Cost price and the selling price and keep the platform fees as blank or null. Hence, the user’s credits will be deducted as per the Selling price configured in the rate plan
Case 2:
The billing with META is being handled by the user and the admin will only be charging the user the platform fees for using the admins platform. In this case, the admin can keep the selling price as null and configure the Platform fee. Hence, the user will be handling the billing with META directly and will pay the invoice as per the platform fee.
Case 3:
In case, the admin wants to charge the user the selling price as well as the platform fee, The admin will configure the cost price, selling price and the platform fee. Whenever the user sends the message, the credits will be deducted as per the sum of Selling price and platform fee. Click on continue to move to the next step.
Step 3: In this step, the summary of the rate plan configured will be displayed for review. Please check if all the details are configured correctly and click on save.
Was this article helpful?