Utility
- 01 Feb 2024
- 3 Minutes to read
- Contributors

- Print
- DarkLight
Utility
- Updated on 01 Feb 2024
- 3 Minutes to read
- Contributors
- Print
- DarkLight
Article summary
Did you find this summary helpful?
Thank you for your feedback!
Queue Message Transfer:
The Queue-to-Queue transfer feature in iTextPro facilitates the seamless transfer of SMS traffic between gateways, allowing you to efficiently manage your messaging operations. This functionality becomes particularly useful in scenarios where your primary gateway experiences an outage or is in a non-functional state for any reason. By utilizing this option, you can redirect your traffic to an alternative gateway, ensuring uninterrupted communication.
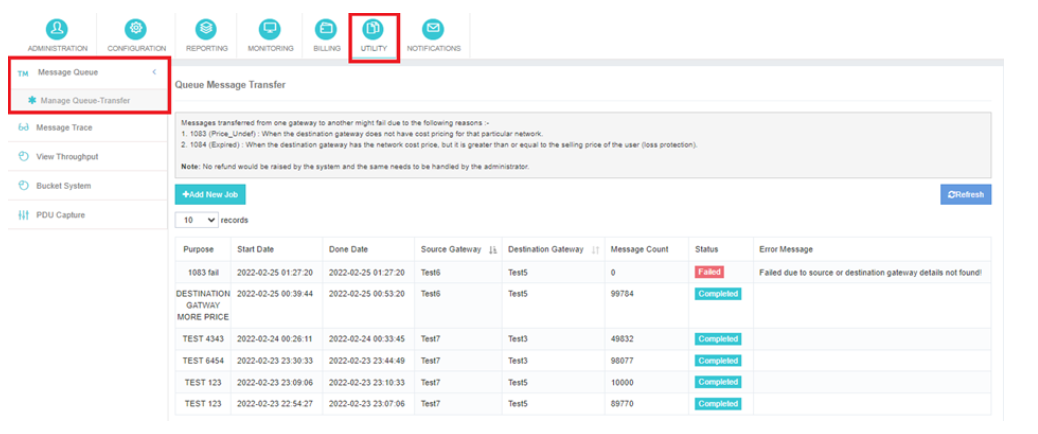
Transfer Configuration:
Transfer Purpose:
Specify the purpose or reason for transferring the SMS traffic. This information helps in maintaining clear records and understanding the context of the transfer.
Source Gateway:
Choose the source gateway from which you want to transfer messages. iTextPro allows you to select the specific messages queue associated with the source gateway.
Destination Gateway:
Select the destination gateway where you want the messages to be transferred. This enables you to redirect the traffic to the desired endpoint.
Initiating the Transfer:
Upon configuring the transfer parameters, click on the "Add Job" button. iTextPro will then add the job to the transfer queue and initiate the process of transferring messages from the specified source gateway to the designated destination gateway. This seamless transfer ensures continuity in your SMS services, even in the face of gateway outages or non-functional states.
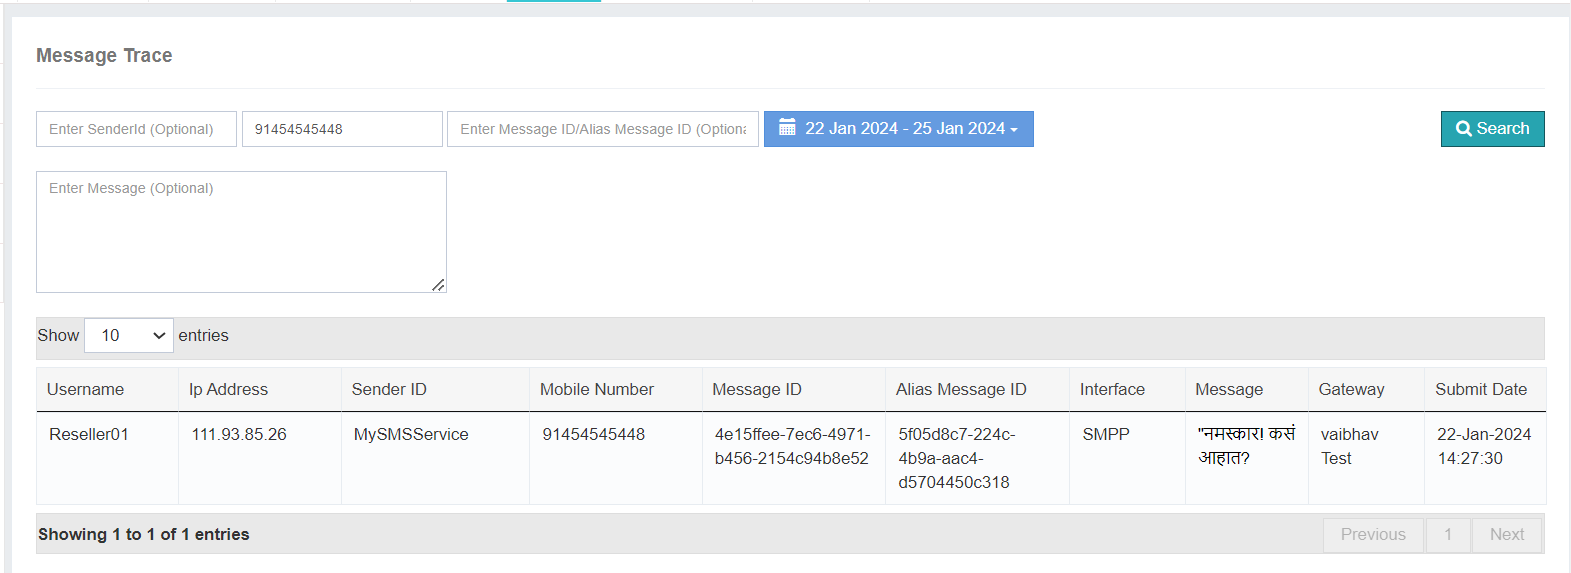
Message Trace:
The Message Trace option empowers you to track and analyze message reports with precision. By utilizing the provided filters, you can retrieve detailed information about specific messages, enhancing your ability to investigate and resolve issues effectively.
Available Filters:
Sender ID:
Filter messages based on the sender's identification. This allows you to focus on messages sent by a particular sender.
Mobile Number:
Narrow down your search by specifying a mobile number. This filter enables you to retrieve detailed reports for messages associated with a specific recipient.
Message Content:
Trace messages using keywords or specific content. This filter helps you identify and analyze messages based on their content.
Use Case:
This feature proves especially valuable when addressing concerns raised by telecommunication providers regarding issues such as Do Not Disturb (DND) violations, blacklisted numbers, or potential spam traffic. By tracing the messages with the provided filters, you can swiftly investigate and respond to any reported discrepancies.
Important Note:
The Message Trace option allows you to review message reports for the last 3 days only. Please keep this limitation in mind when utilizing the trace functionality for troubleshooting or issue resolution.
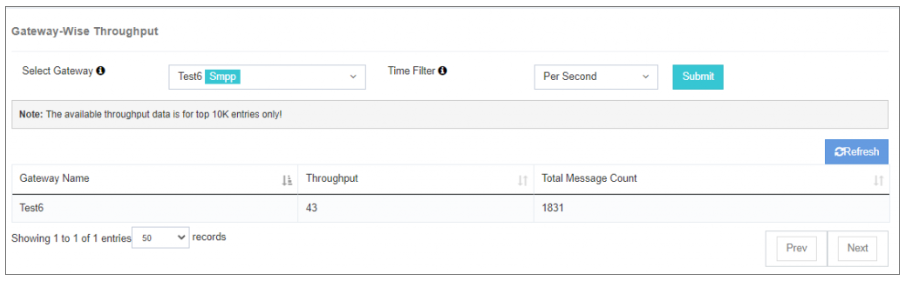
View Throughput:
Use Case:
This option proves invaluable for assessing the efficiency and performance of the Gateway by offering a granular breakdown of throughput metrics over distinct time intervals. Whether you need a real-time overview or wish to delve into historical patterns, the "View Throughput" functionality equips you with the tools to make informed decisions and optimize resource utilization.
How to Use:
Simply select the desired time filter to view corresponding throughput data. This visual representation allows you to identify peak periods, trends, and potential areas for optimization.
Enhance your monitoring capabilities and make data-driven decisions by leveraging the insights provided through the "View Throughput" option.
PDU Capture:
The "PDU Capture" option serves as a powerful tool for capturing live message traffic entering or exiting the Short Message Service Center (SMSC). This feature is specifically designed for real-time troubleshooting of the gateway or External Short Message Entity (ESME) user.
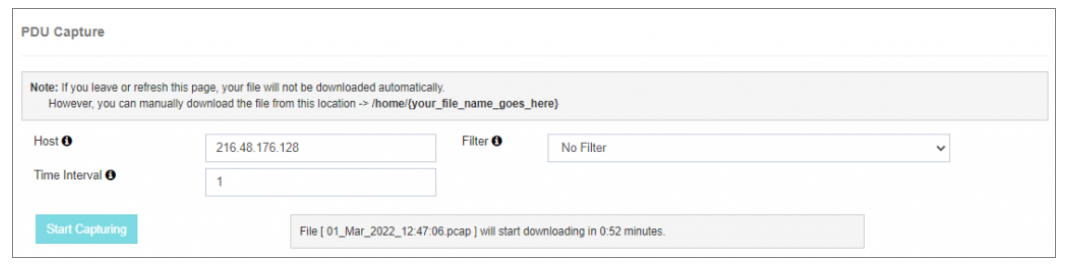
Configuration Details:
To initiate the PDU capture, enter the following information:
Host:
Specify the host address or server IP address of the desired Ethernet connected to the server. This identifies the network path for capturing PDUs.
Filter:
Choose the desired filter to commence capturing live PDUs. For example, selecting filter port number 8585 instructs the application to capture PDUs for the defined port exclusively. Reference the documentation for specific details on PDU Capture with port 8585.
Time Interval:
Enter the desired time interval in minutes, with a maximum limit of 90 minutes. This parameter controls the duration for which live PDUs will be captured.
Note:
The "PDU Capture" option is an invaluable tool for diagnosing issues in real-time. It is particularly useful for users who may not have access to a NOC team or possess extensive network expertise. Ensure accurate configuration of host details, filters, and time intervals for optimal utilization of this feature.
Was this article helpful?